The only way to see if your system recognizes your HDMI port is by checking if the device plugged into the HDMI port is properly functioning. To do this, look for these immediate signs:
The picture you get is distorted or glitchingThere is no sound outputThere is a black screen even though the Monitor is plugged inThe Cable is visibly damaged, loose or bentThe HDMI port is damaged, bent or scratched
If you notice any of these symptoms, it’s time to investigate and resolve the problem.
Why Is My HDMI Port Not Working on PC?
The common symptoms of a bad HDMI port are a lack of sound, image distortions or just no output at all. If the issue is hardware-related, the fix could be as simple as replacing the damaged cable. If there is software incompatibility, then in most cases updating your HDMI and GPU drivers will do the trick. The following are the most common reasons you have issues with the HDMI port properly receiving and sending data.
To Check if Your HDMI Port Is Faulty on a Laptop
Laptops display HDMI ports under the device manager. If you see yours correctly listed there, there is no issue with your laptop recognizing the HDMI port. To check if this is the case, please perform these steps:
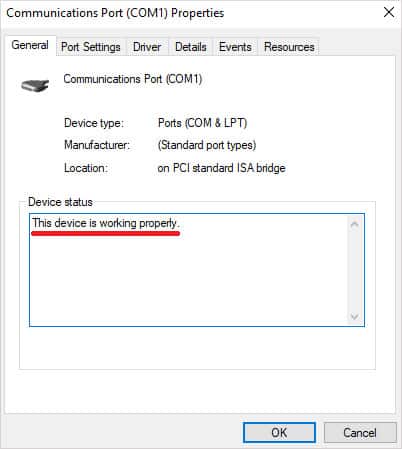
Go to the Windows Start Menu.Type Device Manager in the search field.In Device Manager, locate the tab Display Adapters.Expand the tab by clicking on the arrow symbol.Look, if an HDMI port is displayed, there.If you see the HDMI port right, click it and press Properties.Under properties, look for Device Status.If it displays “The device is working properly”, there is nothing wrong with the HDMI port itself.
I use a desktop PC so that the HDMI port won’t show up. Still, the Device Status is displayed on another Communication Port. If you see this status for the port on your laptop, proceed further. Below are all the necessary troubleshooting steps to resolve these potential causes that prevent your HDMI ports from working correctly. Go through the steps in the given order to fix your HDMI issue.
How to Fix an HDMI Port on Windows
Before you attempt any other troubleshooting steps, there is no point if the port itself is physically damaged or the HDMI cable is faulty. This is the correct way to check your HDMI port for physical damage: After confirming that the HDMI port and Cables are in working order, proceed with the Software fixes:
Scan Your PC for Hardware Changes
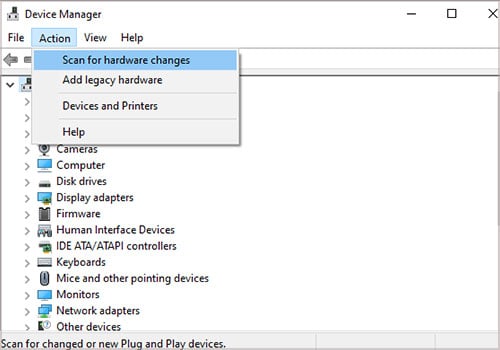
The way to force your PC to scan for newly plugged in devices manually is to check for hardware changes in the Device Manager tab. Here are the steps:
Go to the Windows Start MenuType Device Manager in the search fieldIn Device Manager, locate the Action tab on top of the menuClick on Scan for Hardware Changes
If you now see your display/ device correctly showing up in the Device Manager under “Monitors”, restart your PC to get the HDMI port to work correctly.
Change the Display Settings on Your PC
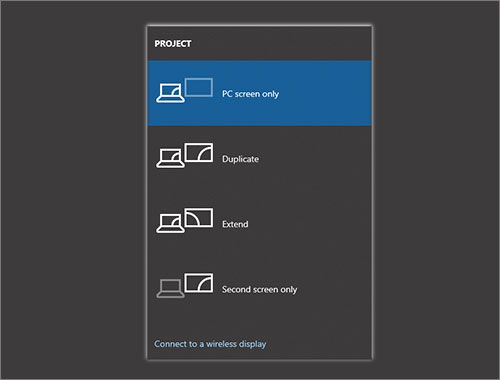
This is perhaps the most effective troubleshooting step. The goal here is to force your PC to display your screen from the HDMI port correctly:
Press the Windows key + PYou will see the following menu appear.Go through all the options until a picture appears on your Display that’s plugged into the HDMI port
These settings tell your PC what configuration to display information on your Main Screen. If you have a laptop, make sure that Second screen only or Duplicate is enabled.
Update Your Video Card/ Motherboard Drivers
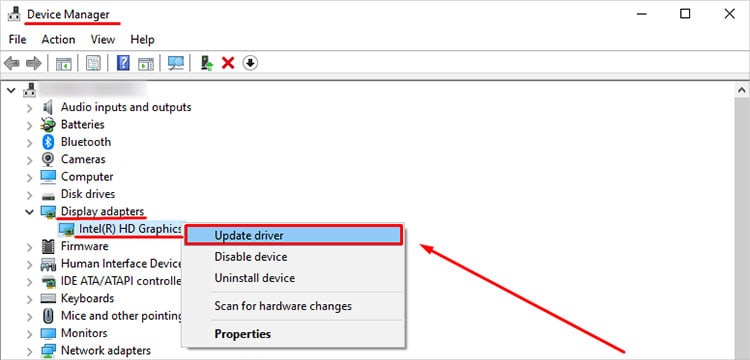
Having an outdated GPU driver can prevent the proper display output on some external monitors. Since the GPU’s in desktops also contain the physical HDMI output port, keeping their drivers up to date can prevent HDMI related issues. Your first option for updating any GPU drivers is by installing and running either NVIDIA GeForce Experience or AMD’s equivalent. The second option is to force Windows to manually update them via accessing the Device Manager update function.
Run the Hardware and Devices Troubleshooter
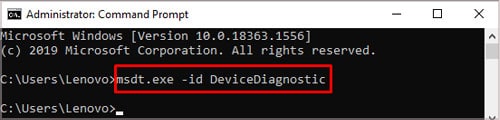
This troubleshooter is useful as it forces windows to find and repair any possible issues with hardware components. It is already built in by default, but the way you access it is slightly different. To open the hardware and Devices Troubleshooter you need to access it via the command prompt by manual input.
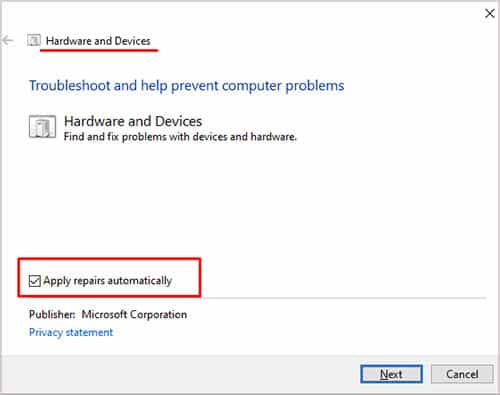
Press the windows key and type CMD in the search bar Type – “msdt.exe -id DeviceDiagnostic” and press EnterYou will see a popup window appear.Click Advanced and tick Apply repairs automaticallyThen hit Next and follow the steps until the troubleshooter is done
After the troubleshoot is done, simply restart your computer to apply the changes and see if your port is properly working now.
Force Windows to Install Pending Monitor Updates
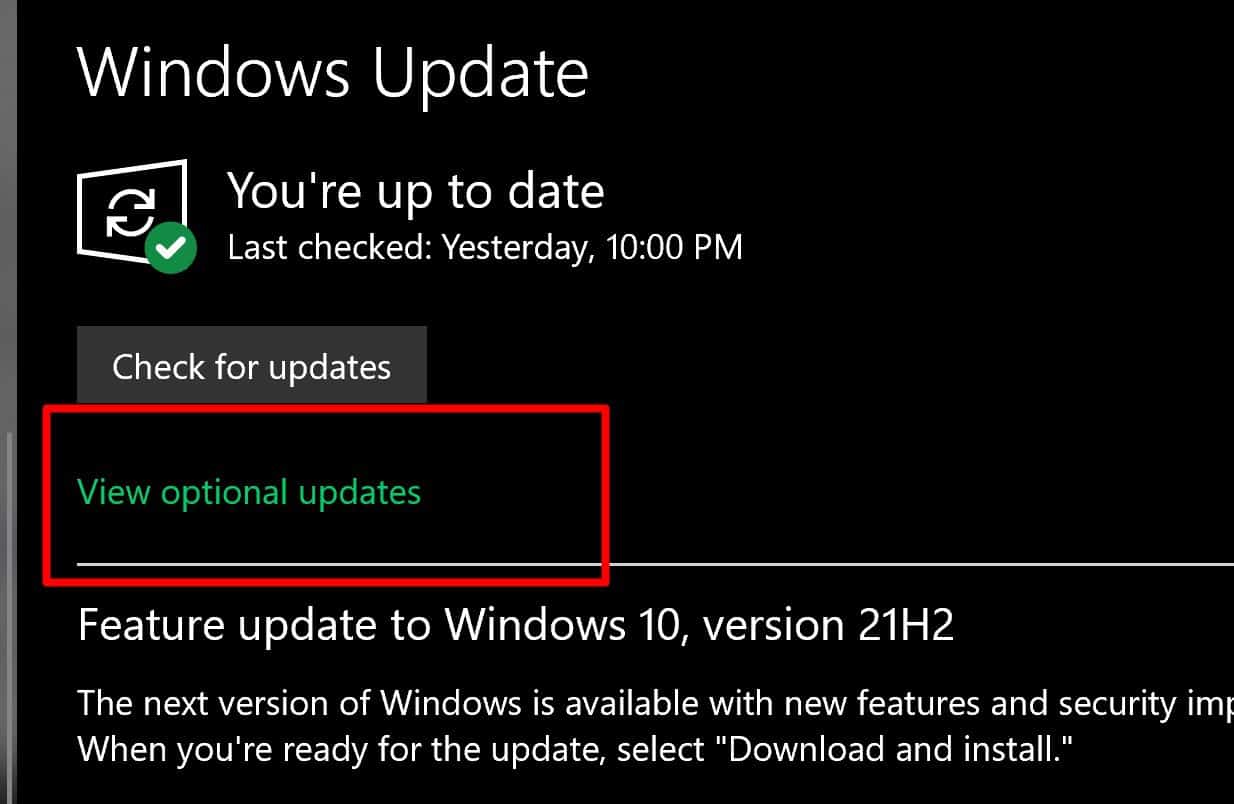
Pending updates are any updates that aren’t automatically installed by the windows update software. As these updates are seen as non essential, users need to manually install them. Here is how to install pending driver updates:
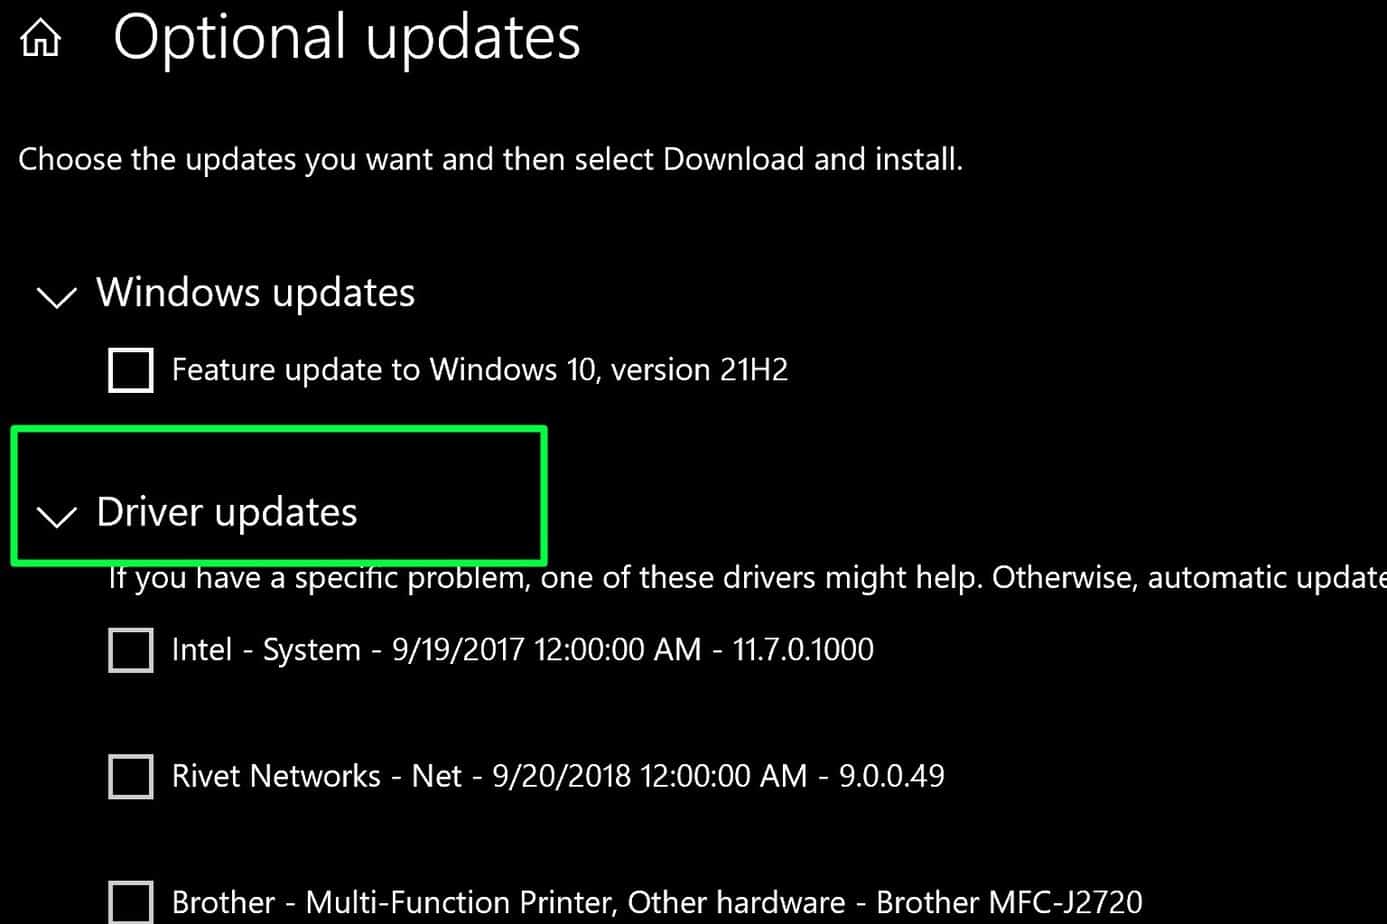
Press the windows key find SettingsOpen the settings menu and click on Windows Update on the bottom leftFind the View Optional Updates tab and click itTick the boxes that are related to your Display/ HDMI drivers and click Download and install
This is how any outstanding updates will appear, in my case there was an optional driver for my PC monitor. These updates can contain important data that the devices work as intended, and can interfere with their recognition by HDMI cables.
Run Windows in Safe – Mode
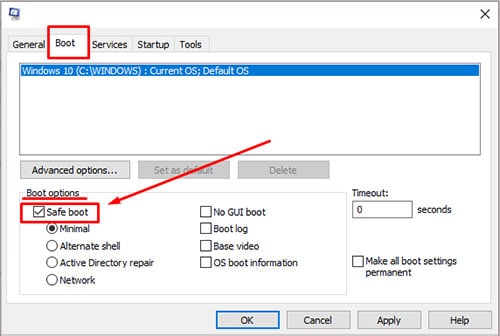
Running windows in safe mode will force all applications and settings to run at their default values. If some data regarding the HDMI controllers was corrupt, safe mode could potentially fix that issue. To run your windows in safe mode do these steps:
Open the Windows Start menuType the command: msconfig and press EnterClick on the Boot TabFind the Boot Tab with different settingsWhen the menu opens, clear the Safe Mode box that is tickedFollow the process until your windows restarts in safe mode
During Safe mode, try unplugging and then plugging the HDMI cable to see if your external device gets properly detected now.
Repair Your Registry Log
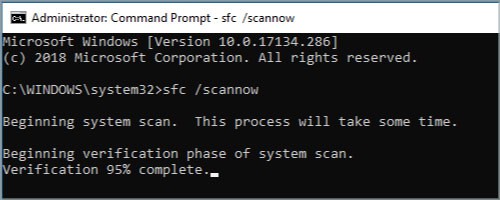
If there are some issues in the Registry files log, your hardware components might not appear correctly. To fix the registry, follow these steps:
Open the Windows Search bar and type: CMDRun CMD as administratorIn the black popup screen, type: sfc /scannowLet your system scan all filesRestart your computer to apply these changes
Roll Back Your GPU Driver to a Previous Version
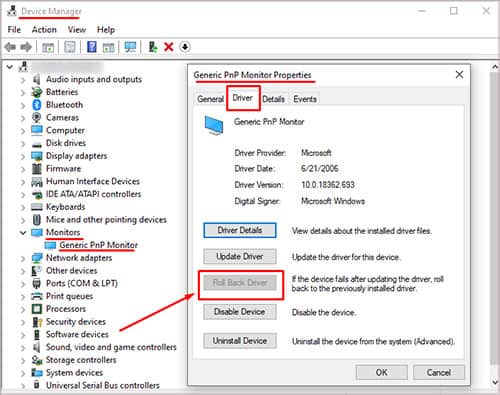
Sometimes returning to a previous driver version can remove some compatibility issues between your GPU and Monitor that are connected via an HDMI cable. Please let this be the last step that you attempt and make sure to keep a backup of your system files before you attempt to roll a driver to a past version back. To Roll Your GPU / Monitor Driver to a Prior Version Follow These Steps
Click on the Windows Start buttonType in: Device Manager and press EnterFind your Monitor Driver under Monitors and right click itPress propertiesClick on “Driver” in the pop up menuClick Roll Back DriverRepeat the same steps for your GPUThe GPU is located under “Display Adapters”
Restart your computer after rolling back to a prior driver version and try to plug and unplug your HDMI after restart to see if the issue persists.
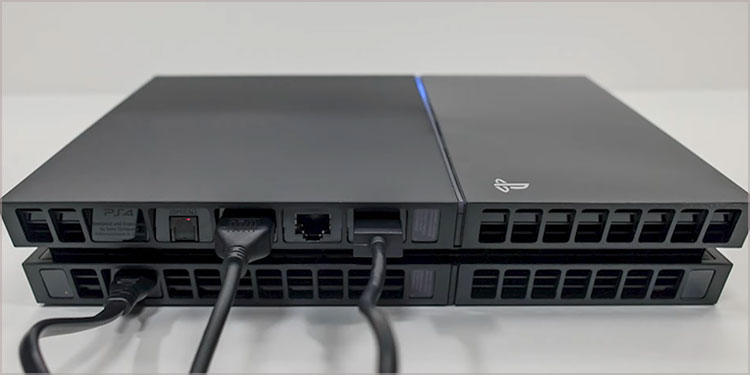
HDMI Port Not Working on PS4 Fix
A similar fix is available for your PS4 the same way as the TV. Ensure that no other HDMI cables are plugged into your main monitor/TV besides the HDMI cable from the PS4.
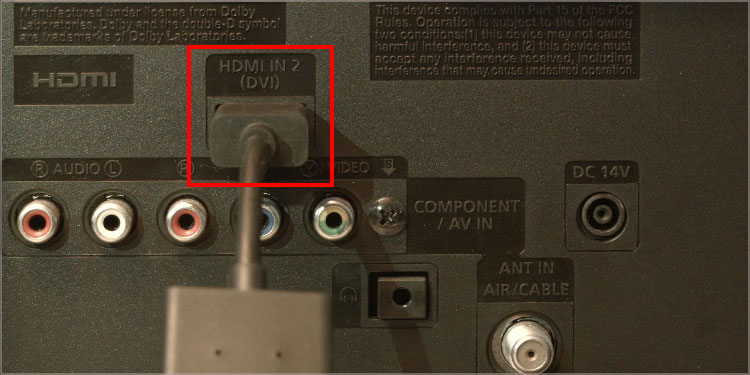
Locate the “Input” button on your remote controller Navigate to the “Output“/”Input” tab via the arrow buttonsFind the option that lets you change your Input portNavigate to select “HDMI 1” and set it as the default outputIf this does not work, try “HDMI 2“, etc.… until you get the correct picture to display
If these settings are done on your PC, you also have to check your PS4 inbuilt options to make sure that the HDMI cable is correctly selected as the Output/Input for your screen. If none of these fixes work, try the following:
Use another HDMI cable to make sure the current one is not faultyPhysically inspect the HDMI connection on your PS4 and make sure it’s plugged in on both sides.Restart your PS4 by holding the power button for 10 seconds.
HDMI Port Not Working on a TV Fix
If you have done all previous troubleshooting steps and still get no output from the HDMI port, you have to troubleshoot the TV screen itself. The fix to force your TV to display a picture is very easy to do.
Locate the Input button on your remote controller Navigate to the Output/Input tab via the arrow buttonsFind the option that lets you change your Input portNavigate to HDMI 1 and set it as the default outputIf this does not work, try HDMI 2, etc.… until you get the correct picture to display
Check to see if your HDMI cable is appropriately set up. Many TV’s have service providers that offer their Output terminal or router. Check if your HDMI cables are connected ONLY to the laptop/ computer / Console device.
HDMI Port Has No Audio Output
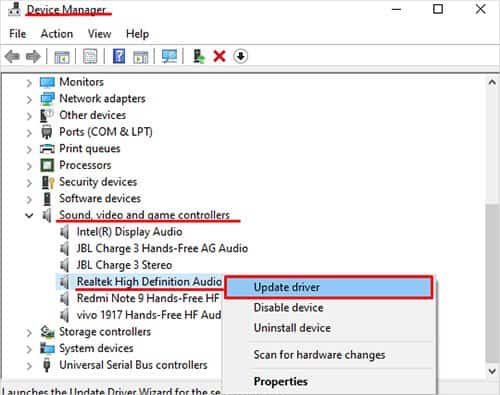
An outdated or missing driver is a common fix to having no input or output from your Monitor’s in-built speakers/ microphone. If your HDMI port shows a picture but no sound, try these steps:
Open the Windows Search bar and type Device ManagerIn the Device Manager menu, find the tab Sound, video and game controllersRight click the driver and click Update DriverRestart your PC after it is done to apply the new updates.
Configure Your Display to Enable Sound
In my case, the HDMI port was working correctly, and the drivers were up to date, but the Display itself came with factory settings that disabled sound by default. To check if the sound is enabled on your screen, follow these general steps:
Locate the button that brings up your Display MenuGo to the Sound Settings and check if it is enabledMake sure that the screen is displaying through the correct port. Some VGA ports, for example, will only output a picture without any sound.
If you applied these steps and still have no audio output, do the following:
Try swapping out the connector cable to your MonitorTry the Monitor with a different device to check if its faulty
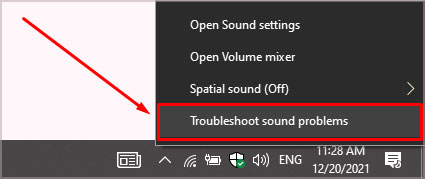
In case these steps don’t work you can run the sound troubleshooter instead.
Find the sound icon located on the right side of your task managerRight click it and press Troubleshoot Sound ProblemsLet the troubleshooter run its course
This is an inbuilt windows troubleshooter and it is useful for finding the exact source of the problem. Many times it will display an error message like: Sound output not found, or microphone is not plugged in, etc.
Finally…
The reason why your devices that are plugged into an HDMI are not correctly working is either because:
The HDMI port or cable are physically damaged or bentThe Drivers for your PC are not up to date, and they are preventing a picture/ sound from appearingYou have not configured your Display to be the main screenThe HDMI port you selected to be used is the incorrect one