When your MacBook returns the aforementioned error message, it means that your storage space is going to be full soon and if you don’t take immediate action, your computer will start to perform slowly. It is said that at least 10% of your entire disk space should be dedicated to the macOS for normal system performance. So, if you are about to run out of storage space, it is recommended that you clear some disk space. So, this guide will take you through all the steps you can take to free your storage space and fix the not enough disk space problem. So, here we go!
How to View the Storage Space on My Macbook?
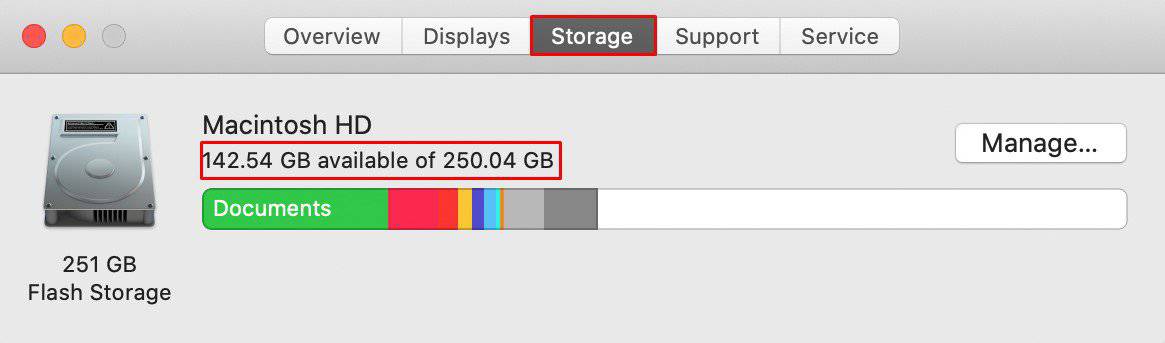
So, before you dive into the fixes, first be sure how much storage is left on your system. And after this, you can think of a plan to clear a certain amount of disk space as per your requirement. The system storage space can be viewed directly from the menu bar. Here are the steps to do so:
How to Fix Mac Not Enough Disk Space
The low disk space on your MacBook can be managed by some pretty basic procedures. Since large-sized files are the main culprit behind this issue, we will work to clear some unuseful and unnecessary files from every nooks and crannies of your hard drive. So, look at, skim and follow the steps shown below.
Remove Unnecessary Files
When your disk is full, the first thing to do is to remove any unnecessary files and folders stored on your computer. These files might be copied from another computer or also downloaded from the internet. So, go to Finder > Downloads, and delete any unnecessary files that you might have previously downloaded. Either that or back it up on an external USB drive. For me though, movies and software applications consume the most storage space. So, when I run out of space, I usually delete the movies entirely from my computer. Hence, check your computer for any files, images, videos, or documents that you don’t particularly need right now and delete them immediately.
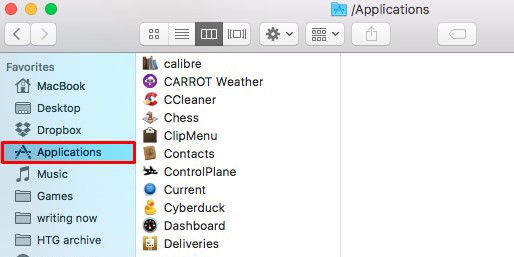
Uninstall Applications
Another basic procedure you can follow is to delete applications that you don’t use regularly. The application, along with its temporary files tends to consume a significant amount of space on your disk drive. So, head over to Finder > Applications, and right-click on an appropriate application to move it to the bin.
Empty Your Bin
Deleting a file/application is usually not the end of it. The items in your trash can still consume the same amount of storage space unless you remove them from the bin as well. So, any applications and files you deleted from the Finder must also be deleted from the trash can to free a significant amount of disk storage. So, for this, hover towards the dock and right-click on your Trash can to select Empty Trash. This will now free up a considerable amount of storage depending on the files and applications you removed.
Remove Duplicate Photo Libraries
Sometimes weirdly, duplicate photo libraries are created on your macOS. More often than not, when you switch to the default photo app, these kinds of things are known to happen. These duplicate libraries are the exact copies of the original ones and hence, deleting them won’t make much difference, other than one, freeing up the much-needed space. And even if you’re in a dilemma on whether or not to delete the ‘duplicate’ photo library, you can always back them up beforehand. So, once you’ve done this,
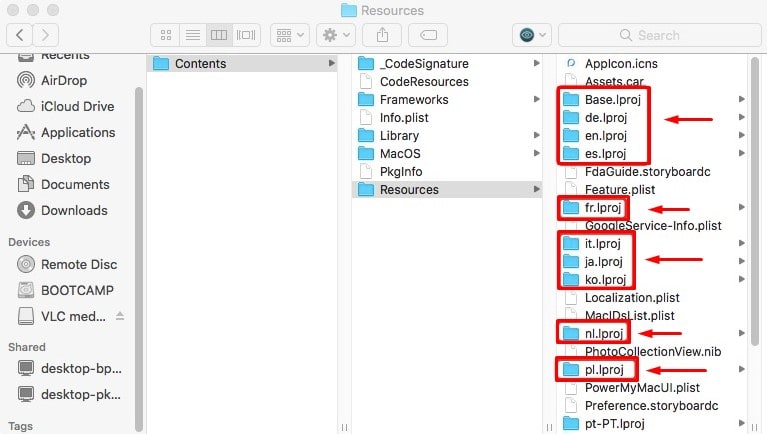
Remove Unnecessary Language Files
Applications these days usually come bundled with localization files. They are simply known as language packs. Through these packs, you can select language(s) to run your application on. That is, depending on the application, you might have the option to use the app in either Spanish, German, or English. However, the other hundreds of languages that you are never going to use are just taking an extra amount of disk storage. So, clearing them out is usually the smarter move. Hence for this,
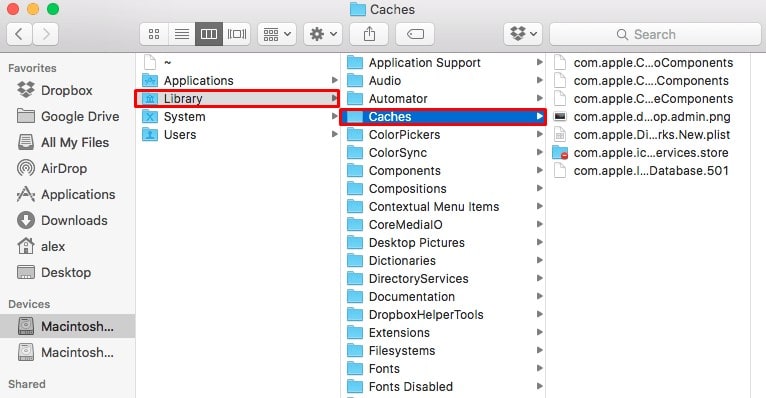
Clear Cache Files
Your system and the applications within it create cache files that store user data, profiles, and frequently used information. Clearing these cache files will not make much difference to the particular application, the only difference being that the app will start up a bit slower than before. But once you use the application 2-3 times, it’ll regain its previous speed by creating new cache files to extract information from. So, when you’re low on disk space, it’s best to clear your cache files for the time being to make room for your OS to operate smoothly. Hence, for this,
Remove Other Application Files
Even after you delete an application, its data will still be stored on your computer. So, if the application is not needed anymore, chances are that their data is also not required. A single one of this file does not take much space. But when taken in a bulk, they consume a considerable amount of storage that you should free up as soon as possible. These ‘leftover’ files can be found in the Library folder. So, So, navigate to each of these folders, look for the name of your deleted application and proceed to delete any files inside the particular folder.
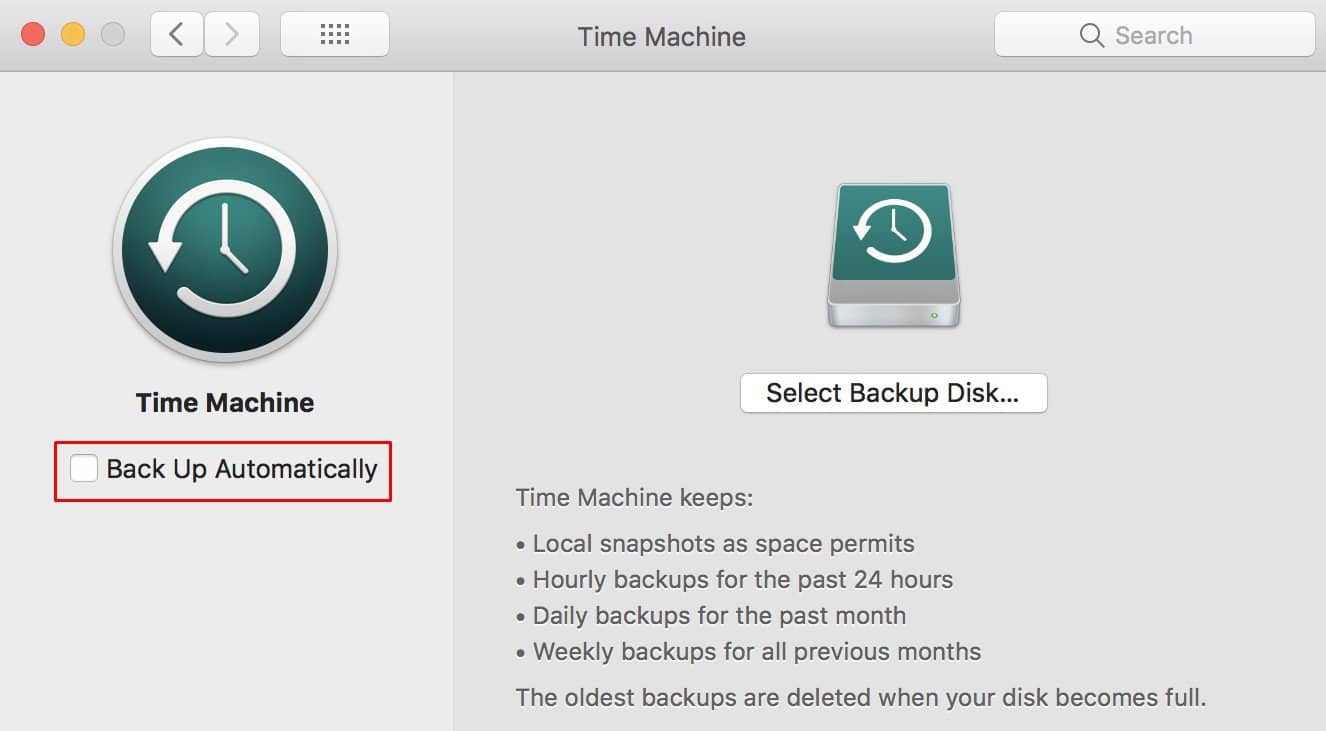
Do Not Enable Time Machine Automatic Backup
If you have enabled the automatic backup feature on the Time Machine application, it has most probably created system snapshots that are itself stored on your computer. And naturally, these snapshots take up a ton of storage space. Although these are important backup files, they must be removed to free up your memory. Think of it as a price to pay for salvation. On the brighter side, the process to do so is relatively simple. So, for this, Once this is done, the system will gradually clear up the backup snapshots to free up your storage. Also, newer backups will not be created. However, you can use third-party backup applications for a Mac to solve your problem.
Clear Your iOS Backup Files
If you have a habit of updating your iOS device via iTunes, chances are that the macOS has created separate backup files for storing the iOS files. Like any other backup data, iOS backups also take up a significant amount of disk storage. So deleting them is necessary to clear your system storage. Hence, Similarly, your iOS update files can also be stored on your MacBook. And if that’s the case,
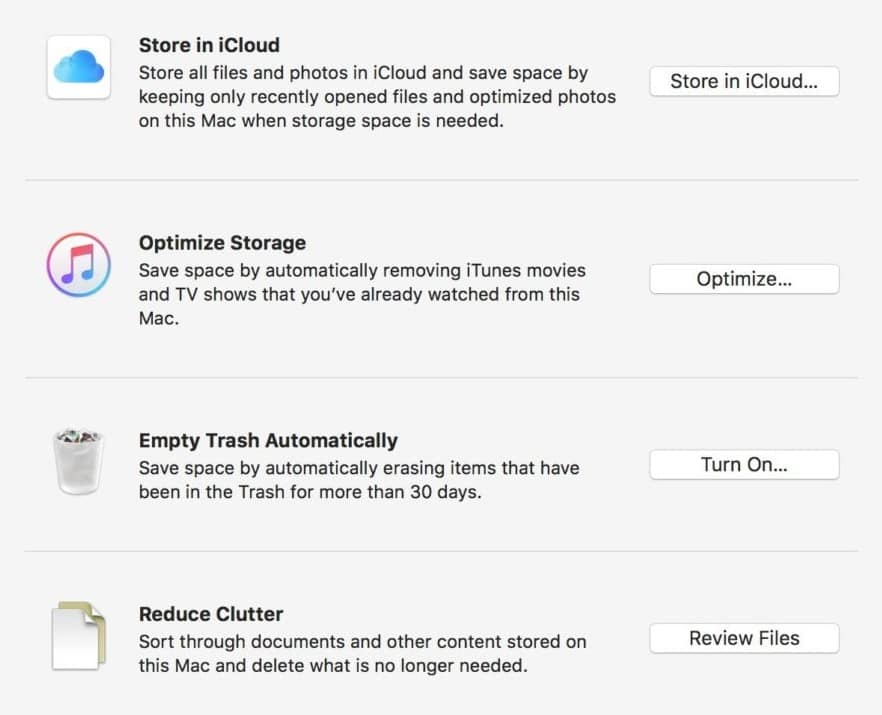
Optimize Your Storage
Running out of storage space is a fairly common scenario. So, Apple has created a built-in feature that can help you manage and optimize your system storage. This can be done via the storage management window which can be accessed directly through the menu bar. So, for this, You’ll now enter the storage management window. Here, you have the option to Store in iCloud, Optimize Storage, Empty Trash Automatically, and Reduce Clutter. These options are pretty useful when it comes to managing your storage space. A simple and brief description is shown below each option for your understanding. So, head over to the storage management window and manage your system memory.
Upgrade Your Storage Space
And if none of the aforementioned steps are efficient for you, you have to invest in extra storage space. So, you either have to install an additional SSD or upgrade the existing one. Or, you can also use an external hard drive, which is a lot easier and a lot cheaper option. However, once you invest in additional storage, managing files and folders on your computer will start to feel pretty easy and efficient. That’s because, if you’ve run out of memory with the current storage plan, chances are, you’ll again face this problem in the future unless you upgrade the specs. However, if it happens again, you know where to find a genuine guide!